Chocolate Cherry Ice Cream Float

cherry floatI haven’t been cooking very much this summer. Partly because I’m on a go slow in the kitchen after testing over 350 recipes for both Recipes from Brixton Village and Slow Cooked and partly because all I’ve wanted to eat for weeks are cherries.

Particularly abundant and well priced this season, I’ve been buying pounds and pounds of them from Brixton Market for £1.50 a lb and just gorging on them for breakfast, lunch and dinner. They are one of my favourite fruit and it’s been utter luxury to indulge like I have been. In fact, I’ve even managed to have too many of them and needed to find ways to use them up.

Some of my lack of appetite has come from how warm it’s been and I’ve been alternating my cherry fest with ice lollies and sorbets, but hadn’t felt the urge for actual ice cream until I saw some leftover chocolate in the cupboard to go with those cherries and inspiration hit.

I have been a lip balm queen since Mister North bought me a pot of Morello Cherry lip balm from The Body Shop for my twelfth birthday. I cycled through their whole range, not dallying near the Kiwi Fruit one for long, and fell particularly in love with a limited edition version that was Chocolate Cherry. I rationed that little pot out for ages and each swipe of it reminded me how much I loved the combination. I moved on from it to a prized Dr Pepper Lip Smacker and from there to my current die hard obsession with Carmex.

I hadn’t really thought about my lip moisturising choices as a teen since those heady days, but standing there with a bag of cherries in one hand and a bar of chocolate in the other and I just knew what I had to do. I had to combine all the best things of my early years and make a chocolate cherry Dr Pepper ice cream float immediately.

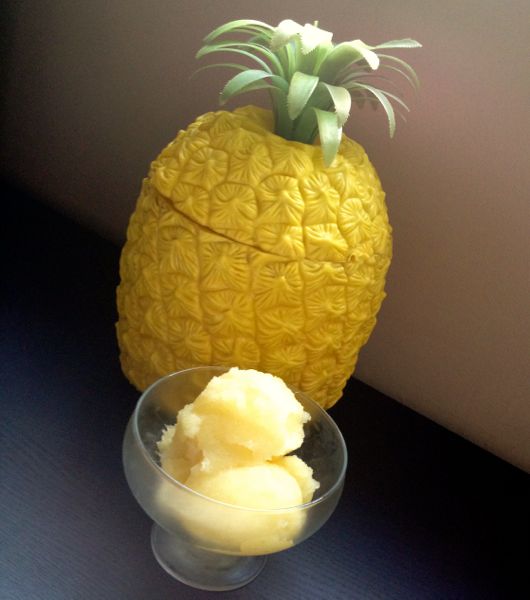
Chocolate Cherry Ice Cream (makes one litre)

  • 450g fresh cherries, pitted
  • 25g sugar
  • 200g milk chocolate
  • 600ml double cream
  • 397g tin condensed milk

This is the simplest ice cream possible made to a non churn recipe I love so much I even used it for my Observer Food Monthly piece last year. It freezes quickly and scoops straight from the freezer and can be adapted to any flavour you fancy.

Begin by pitting your cherries. I find this oddly relaxing and not particularly faffy to do. I end up with lots of halved cherries. Lay them out as flat as possible and sprinkle the sugar over them to macerate them. This makes them lovely and juicy. Leave for up to an hour.

Break the chocolate into a large bowl and set it over a pan of boiling water, making sure the water doesn’t touch the base. Stir it well as it melts to keep it nice and glossy. Once melted, set it aside to cool down for about 10 minutes.

Take the macerated cherries along with any juices they have created and roughly puree them with a hand blender. A bit of texture is fine, but try not to have any bits of skin if you can help it. Set them aside.

Pour the double cream into a large bowl and beat until it starts to thicken. You don’t want it to be whipped cream, but to get to the point where it flops over lazily and thickly. At this point, beat in the condensed milk until combined and airy. An electric whisk is nice here but some old fashioned elbow grease does the trick too.

Stir in the melted chocolate and the cherry puree. Fold until completely combined. It will be a pale pinky brown in colour. Pour it all into a plastic container and put the lid on it. Freeze for at least 4 hours. It will be a lovely creamy soft serve style.

Chocolate Cherry Dr Pepper Ice Float (makes one)

  • 330ml can full fat Dr Pepper
  • 1 large scoop chocolate cherry ice cream
  • kitsch item to accessorise, either an umbrella or gaudy cocktail stirrer

To make your ice cream float, get a good sturdy glass and pour an ice cold can of Dr Pepper into it. I am that person who genuinely likes the taste of diet fizzy drinks usually, but it’s got to be the real deal here.

Then gently drop your scoop of ice cream into the glass. The soda will fizz and froth and create the finest carbonated beverage on earth. Stick a straw in the glass, swizzle with a stirrer (I favour a flamingo myself here) and set a long spoon on the side before getting stuck in.

You cannot eat or drink an ice cream float neatly so don’t try to. Simply savour the flavours and revel in it. When I say this float is the taste and excitement of my whole childhood served up in one glass, I don’t think I’m quite doing it justice. It’s my favourite thing of the whole summer, maybe even the year…


Coffee Crème Caramel

IMG_4012I’m loving the bit in the Saturday Guardian Cook section where well known food people choose their last meal. The fact that they are allowed to set the scene as to where they’d eat it and with whom reminds us that a good meal is about more than just the food. But the food is pretty important too and each time I read one of these I start debating what my final meal would involve.

There would definitely be squid, but would it be a tender slow cooked squid stew with ripe tomatoes or would it be chargrilled for moments til the edges blacken and the tentacles have the right amount of chew? Maybe some deep fried crispy salt and pepper squid? Or would I regret not having the salt and chilli version?

Would I have a perfectly pink middled duck breast or a steak so blue it’s still mooing for the main course? Indecision is my greatest forte so I just get myself tied up in hungry knots each Saturday morning, except for one thing. I know exactly what I’m having for dessert. Crème Caramel.

I love crème caramel so much there is no such thing as a crème caramel I don’t like. I even love the hell out of those 69p for four supermarket ones that are like a milk jelly in an oddly shaped tub. My love is unconditional for this classic dessert. Yet for years I never made it, reaching for the Bonne Maman ones in the posh glass ramekins instead and believing it would be fiendishly tricky to make.

I’m not sure what convinced me to try making it when I had such a mental block about it, but I had the idea of doing slow cooker crème caramel for the book and discovered that making it is even easier than eating a whole family pack of them in one sitting. You’ll have to wait til Slow Cooked comes out on November 6th for the slow cooker version, but here’s a stovetop one that combines the flavours of coffee and vanilla to tide you over.

Coffee Crème Caramel (makes 4)

  • 120g sugar
  • 60ml water
  • generous pinch salt
  • 3 eggs
  • 25g caster sugar
  • 1 teaspoon vanilla extract
  • 1 tablespoon instant coffee
  • 400ml whole milk

Do not think about making this with skimmed or semi-skimmed milk or it won’t set properly and will collapse on itself if you try to turn them out of the ramekins. I actually tend to use milk powder for as I live in a very Portuguese area where everyone keeps a tin of Nido in the house.

Start by making the caramel. Put the sugar and the water in a stainless steel pan on the cooker. Non stick pans can make the caramel crystallize and become granulated. Melt the sugar over a medium heat, stirring constantly.

When the sugar is completely melted, stop stirring and allow the caramel to boil to a dark rich colour. Keep a close eye to make sure it doesn’t burn. It should take about 10 minutes. Remove from the heat immediately. Add the salt and stir in.

Pour an equal amount of caramel into each of the ramekins and set aside to cool and harden. Don’t put them in the fridge or the caramel becomes soft and tacky. It will take about an hour for the caramel to set. Leave aside until needed.

To make the custard, warm the milk in a pan. While it is coming to a simmer, beat the eggs in a bowl with the caster sugar until they are thickened. When the milk is warm, pour a little bit of it into the eggs and whisk. This tempers the eggs to stop the custard splitting.

Pour the tempered eggs into the remaining milk and whisk together. Heat gently until the custard coats the back of a spoon. Add the vanilla extract and the instant coffee and stir in well. Remove from the heat immediately and pour the cooked custard into the ramekins, leaving a few centimetres of room for expansion.

Set the the filled ramekins into a deep baking tray and pour enough boiling water into the crock to come about two thirds of the way up them. Carefully set this bain marie into the oven and and cook the crème caramel on 150℃ for 25 minutes.

Lift the crème caramels out of the oven. There should be no bubbles round the edges. Allow the crème caramels to cool for an hour or so and then put them into the fridge overnight. This means the caramel will absorb into the crème properly

When you are ready to serve, simply turn the crème caramels out onto small plates and eat. The caramel will cascade down the side of the custards as well as flavouring the base of them, mixing beautifully with the soft rich coffee flavour to make the most delicious version you’ve ever eaten. I’d keep telling you how good they are, but I’ve got my mouth full…

Pineapple Sorbet

pineapple sorbet Aside from friends and family, I think the thing I miss the most about Northern Ireland is its selection of ice lollies. Considering its such a chilly corner of the world, we love our frozen treats. Ice cream has its merits, but there’s something about ice lollies that we especially enjoy.

These lollies held a massive lure when I was a kid popping to the local shop with my pocket money. Sometimes you went for quantity over quality and got handfuls of those Mr Freeze freezepops in the long plastic containers, making sure there was at least one Blue Raspberry flavour per batch. A freezepop fest didn’t count unless you dyed your tongue an unnatural shade.

But more often, it was all about branded lollies on wooden sticks. I’m old enough to remember when they embossed jokes onto the sticks and this was worth the potential to set your teeth on edge with the wood. Walls offered us Mini Milks and Funny Feet, but I didn’t like either much. Lyons had the iconic Fab and the Mivvi, but they were cinema lollies not hot day ones. I adored Irish company HB‘s Fat Frogs which were apple flavoured and had a soft spot for a shark shaped one that was sharp and citrus flavoured and a blackcurrant Dracula lolly too, but my love lay (and still does) with Norn Irish classics from Dale Farm.

Leaning over the freezer trying to choose between a Rocky Rasper (raspberry, but not blue), the sugar free but lovely lemon-lime Supa Cool, a smooth vanilla Mr Frostie (in lieu of the toy lolly maker of the same name) or the crocodile branded Choc Pop was tricky. I never wanted a Joker with its orange outer and ice cream middle and I hated orangey Quenchers too.

My first choice was always the Pear Picking Porky, the undisputed classic ice lolly of all time. Not, as my Slovakian surrogate sister once asked, pig flavoured, but made of that artificial pear flavouring that is nothing like the fruit, these lollies the spot every time. I’ve even eaten them walking up Botanic Avenue on Boxing Day. The only problem with them is that they are so popular they sell out easily, meaning one needs a back up plan.

For me this comes in the shape of a Polly Pineapple. So when I found myself far from Belfast in the middle of a heatwave and craving frozen salvation, I knew I could muster a pineapple lolly in London rather than a pear one. Surely it would be pretty simple?

And it was, coming in with a whopping three ingredients. The tricky bit came when I could not for the life of me get the lollies out of the cheapo moulds I bought in the pound shop in one piece. The sticks slid out, there was swearing and then in a fit of frustration, I scooped the slightly slushy sorbet out with a spoon and refroze it in a Tupperware. Success…

Pineapple Sorbet (makes about 500ml)

  • 1 whole fresh pineapple or 425g tin of pineapple chunks
  • 100g sugar
  • 75ml water

I like tinned pineapple (blame my Mallory Towers habit as a kid) so that’s what I used but if you can get a super sweet and ripe fresh pineapple, it’d be perfect. Sniff the base of it, discreetly if in store, and if it smells strongly of pineapple, it is perfect. Peel it, remove the core and chop it up making sure you keep any juice.

If using the tinned, tip it, juice and all into a large bowl. Using a hand blender, blitz the pineapple of either kind and its juice together until smooth and lump free. It should like those nectar style juices you get that contain pulp. Set aside and chill.

Make a simple sugar syrup by combining the sugar and water in a pan and heating together until it forms a thick syrupy texture without changing colour. Remove from the heat and allow to cool down. You will have slightly more here than you probably need for the recipe but it keeps well in the fridge and is perfect for sweetening iced tea in hot weather.

Add about 50ml of the cooled sugar syrup to the pineapple pulp and stir. Pour into a Tupperware container and put the lid on. Put in the freezer and chill for 4 hours. Either give it a stir once an hour with a fork to break up the ice crystals and keep it smooth or leave it alone for 3 hours and then blitz it again with the handblender and freeze for another hour.

Take it out of the freezer about 10 minutes before you want to eat it. It will be smooth in texture and almost like a really really good Slush Puppie. In fact, you could add a tiny bit of dark rum and drink it as a frozen cocktail through a wide straw if you liked. It tasted enough of a Polly Pineapple to quench my craving, but better enough to be worth the effort. Plus it gave me a chance to get the fake parrot and pineapple ice bucket out…


Homemade Mikado Biscuits

mikado 1

I have been on a bit of a biscuit roll recently (if you’ll pardon the pun) and rediscovering all kinds of childhood tastes. I blame that re-run of Nigel Slater’s biscuit programme because it’s certainly not just a desire to cram biscuits into my mouth. Oh no.

I loved making the fig rolls and I loved revisiting the Kimberley, Mikado and Coconut Cream jingle of childhood in my research for it, but honestly didn’t think anymore of it, especially since I was never quite sure which biscuit was which and preferred to say it as it’s all one word. I half thought of looking out for a packet of them if I was in an Asda soon with their weird ‘ethnic Irish’ grocery section.

My attention was actually all about the homemade teacake. I had heard about the rose infused version at Restaurant Story in Bermondsey recently and it got me thinking about playing around with having a go at something similar when some friends came for midsummer afternoon tea.

I’ve had this fantastic sounding recipe for teacakes from the ever wonderful The Little Loaf in my ‘to make’ folder for ages and thought I’d adapt it to make rose marshmallows again and spread the biscuit with rose petal jam. They sounded like they’d go well with a little Pimms on the patio in fact.

I started by baking the biscuits. Except I didn’t have any wholemeal flour, just some leftover buckwheat flour from the galette in Recipes from Brixton Village. Then I realised the rosewater for the marshmallows was three years out of date and smelt like a Woolworths bath and body gift set. It was time to use the random bottle of Polish raspberry syrup I’d impulse purchased a few weeks ago to see if I could add flavour and colour that way.

Raspberry and rose go beautifully so I still needed that rose petal jam: the rose petal jam that I forgot I’d eaten earlier this year and of course couldn’t be found without some time travel. Luckily I had some emergency raspberry jam on the shelf and it would look like it was intentional.

Massive amounts of improvisation later, I was ready to start assembling the teacakes. I spread the jam on the biscuits, splodged on the marshmallow and realised that on a very warm day the jam made it all so slippy I would never be able to coat them with chocolate without disaster. I was just about to give up on the whole endeavour when I realised that with a sprinkle of desiccated coconut I had accidentally created a homemade Mikado and saved the day…

Homemade Mini Mikado Biscuits (adapted from the Little Loaf)

Makes approx 60 bite sized biccies

  • 100g buckwheat or spelt flour
  • 50g rice or plain flour
  • 1 teaspoon baking powder
  • 50g sugar
  • 50g cold butter
  • 30ml buttermilk
  • 1 large egg white
  • 50g sugar
  • 2 tablespoons golden syrup
  • 4 tablespoons raspberry syrup or 75ml raspberry juice and 75g sugar
  • 4 tablespoons raspberry jam (seedless is best)
  • 2 tablespoons desiccated coconut

Start by making the biscuits. Sift the two flours into a large bowl and add the baking powder and sugar. Stir it all well together. Rub the cold butter into it all until it forms what looks like fine breadcrumbs. Add the buttermilk a teaspoon at a time. The dough will come together without being sticky.

Using the palms of your hands, form it into a loose ball and squash it flat into some clingfilm. Wrap tightly and chill overnight or for at least 6 hours.

Heat the oven to 170℃ and roll the biscuit dough out on a floured surface until it is about 1cm thick. Cut out little bite sized biscuits out with the top of a small jar or champagne flute. Lay on a tray lined with greaseproof paper and bake for 12 minutes. I don’t like my biscuits too crisp for this kind of thing myself.

Allow the biscuits to cool while you make the marshmallow. This is the kind of marshmallow you get in big pots called Marshmallow Fluff and for me it never sets to make the solid kind you toast, but is perfect for this kind of thing.

Set a large bowl over a pan of boiling water and melt the sugar and golden syrup together. Using an electric whisk, beat the egg white into it all and keep beating it all over the heat for 6 minutes. Add in the raspberry syrup. I used bottle stuff but make a quick version with the raspberry juice from squashed berries and sugar boiled together to make a thick syrup if you don’t have a crazy Polish drinks aisle near you. Beat it all together for another 2 minutes and remove from the heat to cool.

Put the cooled marshmallow into a piping bag. Do check to see if you have actually have a piping bag first unlike me who had to do the freezer bag trick instead. Spread a tiny blob of raspberry jam on each biscuit and pipe a puff of marshmallow on top. Yours will look prettier than mine I promise. Sprinkle the marshmallow with a scant amount of coconut and if you’re trying to hide the badly piped nipple-like marshmallow you’ve just done, add some edible glitter too.

Leave the biscuits to set for at least two hours before eating and then line them up on a plate to make what looks like one enormous Mikado and inhale them one after the other. Wearing a headscarf and housecoat is of course optional for most people but basically how I always dress when I’m cooking since you can only take the girl out of Belfast….

PS: I’m now on Instagram. Come and say hello!


Fig, Raspberry and Tarragon Rolls

fig rollsLike many Irish people, I more associate biscuits with Jacob’s than McVities. This is a brand so Irish, it was even one of the places taken over in the 1916 Easter Rising as Ireland tried to break away from Britain and declare independence. Biscuits matter back home.

Jacob’s made all kinds of sweet treats when I was wee (it is now no longer an Irish company and cases are fought in court over the name.) Mister North and I could recite the Kimberley, Mikado and Coconut Cream jingle in our sleep, but most of all Jacob’s was associated with Fig Rolls.

They came in an orange packet in those days and our mum was rather fond of them so we always had some in the biscuit tin. I loved them because no one ever commits the disgusting depraved act of dunking a biscuit when they eat a Fig Roll. I have always wondered like the advert asked ‘how they get the figs in the fig rolls?’ and decided the time had come to find out.

Partly inspired by a Greek Fig Pie our dad sent me recently with its spiced fig filling and sesame seed outer and partly by this recipe on the fabulous Food 52, I decided to try baking my own and see if I could have a fig renaissance in my life. The one drawback of a Fig Roll is that they are teeth-itchingly sweet so I added some frozen raspberries to the fig mix to add a little tang.

And to prove I’m a grown up instead of a biscuit tin raiding child, I added a little tarragon to the raspberries as they are perfect bedfellows. In fact the most memorable cocktail I’ve ever drunk involved fresh raspberries and tarragon and gin and I’ve been borderline obsessed with this combo ever since. Told you I was a grown up now…

Fig, Raspberry and Tarragon Rolls: adapted from Food 52 (makes about 40)

For the dough:

  • 75g room temperature butter
  • 100g brown sugar
  • 225g plain flour
  • 1 teaspoon baking powder
  • 1 large egg
  • 2 teaspoons vanilla extract

For the filling:

  • 250g dried figs
  • 300ml boiling water
  • 200g fresh or frozen raspberries
  • 5g fresh tarragon

The dough is best used after chilling overnight so prepare it in advance. It will keep for about 10 days in the fridge if you get sidetracked mid recipe like I did.

Beat the butter and the sugar together with an electric whisk until they are very light and fluffy. This will take about 5 minutes. Add the egg and the vanilla extract and beat until loose and smooth.

Stir the flour and baking powder into this mixture until just combined. It’s a soft almost loose biscuit dough so handle it carefully. Roll into a ball, flatten into a disc and wrap in clingfilm. Chill for at least 6 hours or overnight.

About an hour before you want to make the fig rolls, chop your dried figs into small pieces. I cut each one into six. Put them in a pan with the boiling water and bring to the boil. Simmer until they are soft and plumped up. They should have absorbed all the water. Keep an eye on them as they are thirsty wee things and you might need to top the pan up again.

When they look like they have absorbed as much water as they can without falling apart, take them off the heat and blend well with a stick blender. You will end up with a very smooth pale purple paste. Set aside to cool.

If you are using frozen raspberries, allow them to drain well into a bowl at this stage. If you are using fresh ones, squash them lightly with the stick blender. Chop the tarragon roughly, add to the berries and set aside until the figs are cool.

Combine the figs and the raspberries and then spoon the fruit into a icing bag. They are ferociously sticky so don’t overfill it.

Take the dough out of the fridge and cut the disc into four. Keep one out and return the rest to the fridge. Flour your surface and roll the dough out into a long rectangle about 4 inches by 10. Knock the sides into an even shape with the rolling pin. The dough is fragile and might crack. I sacrificed the very ends rather than push my luck.

Using the icing bag, squeeze four stripes of fig and raspberry paste onto your dough and then fold the sides over. Wet it slightly to allow the top the layer to stick. Cut this fig filled sausage into 1.5 inch pieces and set on a lined baking tray. Repeat with the other three pieces.

Bake the fig rolls in a 175℃ oven for 14-16 minutes. The dough should be golden on the edges but not the top. Take them out of the oven and immediately put the piping hot biscuits in a large Ziploc bag and seal it up. This steams them and keeps them soft like a proper fig roll. I often do this with soda bread too and it works a treat to keep the crust smooth and soft.

When the fig rolls are steamed and cooled, serve with a cup of tea. The remaining biscuits will keep up to 10 days in a tin. The filling in them is lovely. Much more generous than Jacob’s ever was and not as sweet. The dough tastes exactly like the bought ones and they are even easier inhale alongside your cuppa with their soft texture. Much more fun than just opening a packet!