Breadfruit Caesar Salad

Breadfruit caesar salad

I was lucky enough to be offered a cookery masterclass at the hottest restaurant in South London, Bubba’s in Tulse Hill, a few weeks ago. Kitted out in proper whites and everything, I had the undivided attention of their Michelin trained chef, Anthony Cumberbatch who spent several hours talking me through a multitude of Caribbean classics and ingredients.

While the curry goat and oxtail stew simmered, I sampled the menu in the restaurant, loving every minute of the jerk pork belly and the tender trio of fish and seafood with a rich spice crust. The fried plantain with ginger compote was so good I may have run my finger round the bowl when no one was looking. The staff were incredibly friendly and helpful and the portions were so substantial, I could only manage the (excellent) sorbet selection of mango, melon and pineapple after my meal even though the other desserts such as mango strudel or the exotic fruit plate sounded great.

Jerk pork from Bubba's Tulse Hill

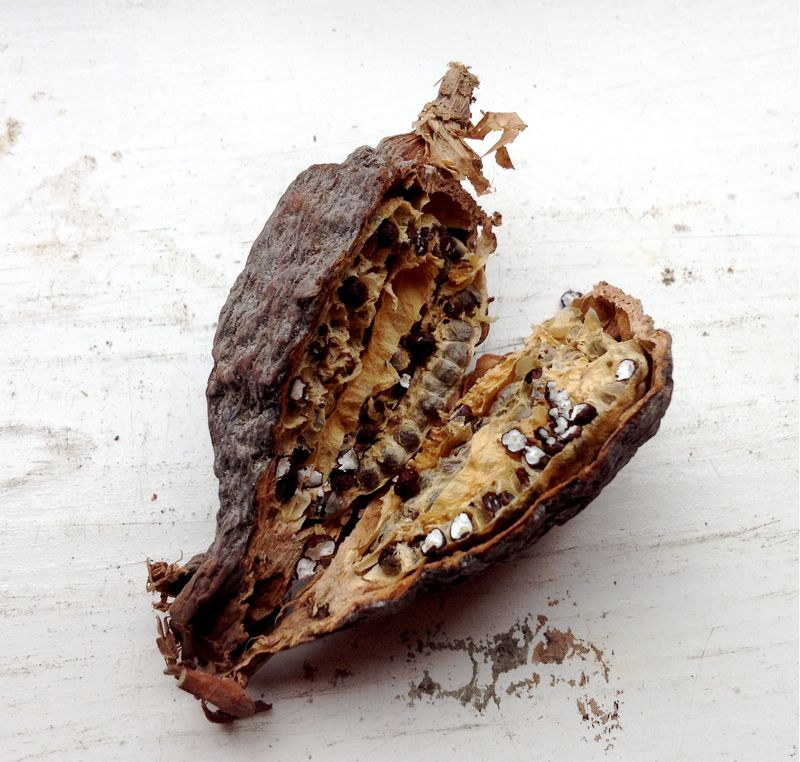
Back in the kitchen Anthony showed me a ingredient I had never even heard of, let alone cooked, in the shape of a breadfruit. Starchy, yet slightly spongy, this fruit absorbs flavour brilliantly, making it a fantastic side dish. It was delicious fried up with some jerk spices and even more than the okra and the goat, I felt inspired to cook with it after the class.

Whole breadfruit

This warm weather cries out for salad and there’s few that I love more than a Caesar salad with a umami rich dressing and crunchy croutons. Still fixated on the breadfruit, I wondered if instead of my usual sourdough croutons I could deep fry some chunks of the fruit and scatter them over crispy romaine lettuce. I had a feeling I’d enjoy finding out…

Breadfruit Caesar Salad: serves two

  • 1 romaine lettuce
  • quarter of a breadfruit (most stalls in the market will cut it as required)
  • 5 tablespoons breadcrumbs (I used panko)
  • 2 tablespoons grated parmesan
  • 1 large egg, beaten
  • 2 anchovy fillets
  • Oil for frying (not olive)

For the dressing:

  • the remains of the egg from above
  • 1 egg yolk
  • juice of one lemon
  • 50g parmesan, shaved
  • teaspoon Worcester sauce
  • 2 cloves garlic (or heaped teaspoon garlic puree)
  • teaspoon capers
  • teaspoon mustard
  • 100ml olive oil
  • freshly ground pepper

Peel the knobbly skin off the breadfruit and remove the inner seeded core. The flesh should be slightly spongy but not soft. Cut into inch chunks and then dip in the beaten egg and then dredge in the breadcrumbs and parmesan until coated. Double dip if you like it really crispy and then fry in hot oil until golden brown and crunchy all over.

Mix the lemon juice, worcester sauce, smushed up capers and garlic and mustard together, add in to the remaining egg (this gets round the fact one egg is always too much when breadcrumbing things) and the egg yolk. Then pour in the olive oil as you would to make a mayonnaise and whisk until emulsified. If it doesn’t thicken, add a blob of mayo instead of panicking.

Drizzle the dressing over freshly washed romaine lettuce, chopped anchovy fillets (leave these out if unlike me you aren’t a member of Anchovies Anonymous) and slivers of parmesan and then add the crispy crunchy croutons. Add a bit more dressing for luck and plenty of pepper and tuck in.

The breadfruit is fluffy in the middle and gorgeously golden on the outside, like the perfect crouton combo. It works extraordinarily well with the anchovy rich dressing and the savoury parmesan. If you use just the parmesan or sub gluten free breadcrumbs you can still eat Caesar salad if you’re gluten intolerant. Try adding more capers and some nutritional yeast to substitute the Lea and Perrins and anchovies if you don’t eat fish. This meal is so good you’ll be serving it to everyone. In fact, it’s good enough to go on the menu at Bubba’s in my opinion!


West African Inspired Mussels and Chips…


West African inspired mussels and chips

Much and all as I love summer, the months without an ‘R’ in curb my ability to eat shellfish as much as I’d like. So thank goodness for the humble mussel which can be eaten all year round. I love them in the summer as a light simple supper that doesn’t need much standing over a hot stove (normally because of the high temperature outside, but this year so it doesn’t cut into my watching TV under a blanket time…)

The French style is most common with mussels and although I love it, I wanted something a bit fresher and punchier.  Some fat scarlet tomatoes from O Talho caught my eye on the way back from Dagon’s and I’d just picked up some picture perfect red chillis from the Wing Tai Asian Supermarket. But as well as the warmth from the capsicums, I wanted some tingle and my mind went to the pod of alligator pepper a friend had gifted me after we shopped in the Village one Saturday.

Alligator pepper pod

Highly prized in West Africa, especially Nigeria where the Yoruba incorporate it into naming ceremonies for babies, this pepper comes in a dry pod that looks like an alligator’s back and has a warm bite of pepper mixed with a slight hint of cardamom. I’ve mainly seen recipes for it involving fish and tomatoes so I knew it was likely to work with my mussels. I have no idea how authentic this might be though…

West African Inspired Mussels and Chips: serves 2 comfortably

  • 1kg bag mussels
  • 1/2 pod alligator pepper
  • 2 banana shallots or small onion
  • two handfuls of cherry tomatoes
  • 1 red chilli or 1 tsp hot sauce
  • 150ml water
  • 2 tsp oil
  • 4 sweet potatoes

First clean your mussels well. Pull the beards from them and discard any that are already open and that don’t close when tapped or that are broken. Leave them to soak in cold water to clean out any grit while you turn your attention elsewhere.

Heat the oven to 200℃ and then peel your sweet potatoes. I used orange fleshed ones from the supermarket. Cut them into chips, making sure that they are all roughly the same size and thickness so they cook evenly. Toss in a light coating of oil and then cook. I used a mesh tray like this which cuts the cooking time and washing up, but you are using an oven tray, they’ll take about 25 minutes.

About ten minutes before the chips are ready, finely dice your shallot and cook in a small amount of oil on a moderate heat until softened but not coloured. If using the chilli, cut finely and add to the shallot. Keep the seeds in if you want more heat. Then take the alligator pepper pod and scoop the seeds out and grind them in a pestle and mortar before adding to the shallot and chilli to cook out slightly. Cut your tomatoes in half and add to the pan. You don’t need any extra seasoning.

When the tomatoes start to collapse slightly round the edges, add in the cleaned wet mussels to the pan. Pour the water on top and put the lid on and cook for about 3-4 minutes or until the mussels have opened and the tomatoes are thickening the juices. Take off the heat and leave the lid on while you dish up the sweet potato fries on a separate plate. Then serve the steaming hot mussels in bowls with a good amount of the tomato rich liquor and then dig in.

The best way to eat mussels is to use the empty shell to pick the meat out of the next. Discard any mussels that haven’t opened and enjoy each flavoursome mouthful as the warmth of the chilli and alligator pepper builds a tingle on your lips and the pile of shells grows. Best eaten with a ice cold beer, a roll of kitchen paper and some non judgemental friends to hand!


This post first appeared over at Brixton Blog celebrating all our lovely local shops.


Rhubarb Surprise Ice Cream Sandwiches

My ice cream life was varied and disparate when I was a wain. There was the exquisite gelato of family holidays to Italy ( scene of one of my most memorable moments when I brattily declared I didn’t like ice cream to howls of disbelieving laughter), Mr Whippy style cornets with a flake on the side, the mouth puckering but moreish lemon sorbet my mum’s friend Ann made at dinner parties and slices of raspberry ripple from a rectangular carton, often served on the side of fresh raspberries from my granny’s garden but also slipped between two wafers to make a slider.

Cue quizzical eyebrow raising from our foodie readers. Well to us Norn Irish (and Scottish) folk, a slider is not a mini burger, it’s an  ice cream sandwich, usually from a van or one of those amazing Celtic-Italian ice cream cafes both countries welcomed so happily due to their super sweet tooth. Possible to make at home if you could get your Dale Farm in the right sized block and work quickly, they were more often a treat bought on a seaside trip or at the end of a Sunday out. They came in several souped up versions such as the nougat wafer (dipped in chocolate and nougat and pronounced nugget) or the seemingly sophisticated oyster, but my favourite was the version that had a Flake inside. I could work out how they got the figs in Fig Rolls, but not the Flake inside one of these.

Quite hard to eat in a dignified manner, these required a careful combo of licking, nibbling, turning and eventually biting to make sure you got every drop without it exploding down your front. I imagine it was their trickiness to eat that has led to them seemingly vanishing without a trace these days. I haven’t seen one for years and neither had the other slightly bemused people I canvassed about them. It looked like I was going to have to make my own version. It was a project worthy of one of Kavey’s ice cream challenges!

Chocolate is all very well and good but my last two batches had both been chocolatey and I felt I needed some fresher and tangier to hit the spot. One of those perfect lightbulb moments happened and I realised that a stick of poached rhubarb inside the ice cream would make a perfect grown up copy of that childhood classic…

Rhubarb Surprise Ice Cream Sandwiches:

  • 4 egg yolks
  • 250ml milk
  • 500ml double cream
  • 100g caster sugar
  • 5 stalks rhubarb
  • pack of rectangular ice cream wafers

I used a silicone tray like this one to make individual blocks of ice cream. All instructions are for this tray, but you could use something else if you prefer.

Roast your rhubarb in the oven at 150℃ for about 20 minutes until soft but still holding its shape firmly. Then set aside the narrower stalks on a plate so you have enough for nine pieces and allow them to drain any juice away. Puree the rest of the rhubarb in the blender.

Then make your ice cream base by heating the milk and sugar together until bubbling but not boiling. Add in the cream. Separate the eggs and beat the yolks in a small bowl. Then add a cupful of the warm cream mixture to the egg yolks and stir. This will temper the yolks so they don’t scramble when you add them to the hot liquid. Then add the egg mix to the warmed milk and cream and cook gently until starting to thicken and coats the back of a spatula. Take off the heat and chill well before churning in your machine.

About five minutes before your ice cream machine has done its job, add in the rhubarb puree to flavour your custard base. Make sure your ice cream is still quite soft and malleable and then put a dessertspoonful in the base of each section of your tray. Place the cut piece of roast rhubarb on top and then cover it all with another spoonful of ice cream so there are no gaps. When all are filled, put the tray flat into the freezer to chill completely for several hours so that each little block is nice and firm.

When you are ready to eat the ice cream, take the tray out about 5 minutes before and run a blunt knife round the block to loosen it and the block should pop out in one piece. Pop between two rectangular ice cream wafers (I used Askey’s for extra childhood nostalgia) and then get your chops round this awesome ice cream sandwich. The ice cream is super creamy and custardy with a proper tang from the rhubarb shot through it and the whole thing is made amazing by the frozen piece of rhubarb which makes it all taste a bit like a quarter of the eponymous sweeties. I revisited childhood memories and instead of being disappointed, it was even better than remembered…


Deep Fried Okra

Recently in my travels round Brixton, I keep coming across Americans who now live here. It’s testament to what a great area Brixton is that many of them say it’s the best neighbourhood they’ve ever lived in and my recipe here is partly inspired by them. But its mainly inspired by my determination not to shudder slightly whenever I see piles of okra on the stalls in the market. I’ve only ever eaten it once when I was a child and was singularly unimpressed by its slimy texture and have avoided it ever since. But encouraged by African friends who consider it a kitchen staple and those Americans who all responded affirmatively when I mentioned it, I’ve decided to give you my melting pot take on it and like the good Belfast girl I am, fry it. I mean, what food doesn’t taste even better when fried?

I’m branching out a bit here and using cornmeal instead of a batter. I’ve only recently discovered this as a coating for things and can’t get enough of its crunchy crispness, preferably dipped in something spicy and delicious. A firey salsa made with the super sweet vine tomatoes that are perfectly in season right now, some smoked garlic and a burst of red onion would take this from side dish to star attraction at dinner, especially with an ice cold beer to accompany it…

Fried Okra:

  • about 200g of okra, cut into 1 inch chunks
  • 2 eggs, beaten
  • 200g yellow cornmeal (also called polenta if you’re looking for it)
  • 1/2 teaspoon chilli powder/cayenne pepper
  • 1 teaspoon paprika
  • seasoning as required.
  • vegetable oil for frying

Get your oil on to heat, making sure you only fill your pan a third full of oil so it can’t bubble over. You want it hot but not scorching.

When buying the okra, make sure the pods are nice and furry and not split at all. Wash them and dry them well. Cut each pod in roughly three pieces. Then dip the pieces into the beaten egg before putting them into the cornmeal and making sure they are well coated. Don’t hang about, do both dippings quickly and put them into the oil immediately to cook. Give them about 2-3 minutes each side or until the okra and the coating both go golden.

Serve immediately, preferably dipped into a little hot sauce and salt. We had them on the side of some curry goat, but these fried okra will go with anything and make a great gluten free vegetarian dish. If like me, you were nervous about the slime potential, don’t be. Fried up like this, it’s a good balance between soft and crunchy and I surprised myself by having seconds, as did my American dining companion…

Okra pods

*An edited version of this post originally appeared at Brixton Blog.

Warm Octopus Salad

 Warm Galician octopus polpo salad

 The more I cook, the more I realise I want to cook. Each meal becomes a fabulous opportunity to do something I want to and something to be savoured. We all have our trusty standbys and favoured dishes, but when the chance to do something completely new comes along it thrills me. So when Liz* from Brixtonia suggested getting together and cooking fresh octopus, I was all over the idea. I’ve never met seafood I don’t love and it seemed like a perfect challenge.

I have to admit that I didn’t have a clue what to do with our eight legged friend so luckily Liz has access to a stack of cookbooks with some good ideas and emailed me several, mainly from Rick Stein. We pondered over two and couldn’t quite decide on which so thought we’d combine them both. But first up was getting our items. We needed a trip to the market.

Saturday morning saw us up relatively bright and early and in the queue at Dagon’s for our octopus. I’ve said it before, and I’ll say it again many times, Dagon’s is the jewel in Brixton Market’s crown. They have a vast choice, good quality, are excellent value and have friendly and helpful staff. I try to go at least once a week and I must admit I get a real kick out of being recognised by the staff there now. It’s like visiting the 50s high street but with more women’s lib and better banter.

They talked us through buying the octopus and we went for one whole cleaned octopus. I forgot to weigh it when I got home but it cost us a very reasonable £4 for the whole thing. We also picked up some samphire, a kipper fillet for me and a mackerel for Liz and the whole lot came to an even eight quid. Can’t say fairer than that. We got everything we needed and a box of Alphonso mangoes we just wanted and then got down to the cooking.

Galician Octopus Salad (From Rick Stein’s Spain)

  • 1 clean octopus
  • 400g waxy potatoes, peeled and cut into chunks
  •  2 tbsp olive oil
  • 2 tsp paprika (of your choice)
  • 1/2 tsp of cayenne pepper if not using hot paprika.
  • 1 tbsp salt

This is so simple it’s untrue. Take your cleaned octopus and put in a pan just covered with water and the tablespoon of salt and bring to the boil. Then reduce the heat to a simmer and cook for 45 minutes to an hour. That’s it. That’s how you cook an octopus. We didn’t tenderise it in anyway, either by freezing and thawing or bashing it against the rocks or anything else. We shoved it in a pot of water, left it well alone and went and had a glass of wine and a good gossip.

Octopus

After an hour, we came back and lifted the octopus out of the cooking water and left it to cool on a plate. It had turned the beautiful mauve we both associated with Spanish octopus dishes and the tentacles had curled in beautifully. We added the potatoes into the remaining cooking water and brought them to the boil until tender but still al dente. Then heat the olive oil, add the paprika and cayenne and fry the potatoes until golden and crispy.

Cooked octopus ready to slice

While they are sauteeing nicely, cut the octopus into inch or so chunks, using both the tentacles and the head and body. Take the potatoes off the heat and add the octopus in for a few seconds just to warm it through and coat it with the paprika. Dish up with some chopped parsley (our concession to the other recipe we had planned as well) along with some vegetables if you so fancy (we did steamed samphire and roasted aubergine and tomatoes) and enjoy!

The octopus was firm but very tender without a hint of rubberiness. It was slightly sweet and very flavoursome, especially alongside the potatoes. Slightly salty, intensely umami and crispy round the edges, these were the best fried potatoes I’ve ever had. Simple and packed with flavour, the whole meal was fantastic. We feasted well, but with a few more spuds, the one octopus would easily serve 3 -4 making it good value as well as impressive and delicious. Until now, all my cephalopod ardour was reserved for squid, but there’s another many legged love in my life now I’ve discovered octopus…


*Thanks to Liz for her cooking skills, being an excellent guest and taking that fantastic sea creature shot!