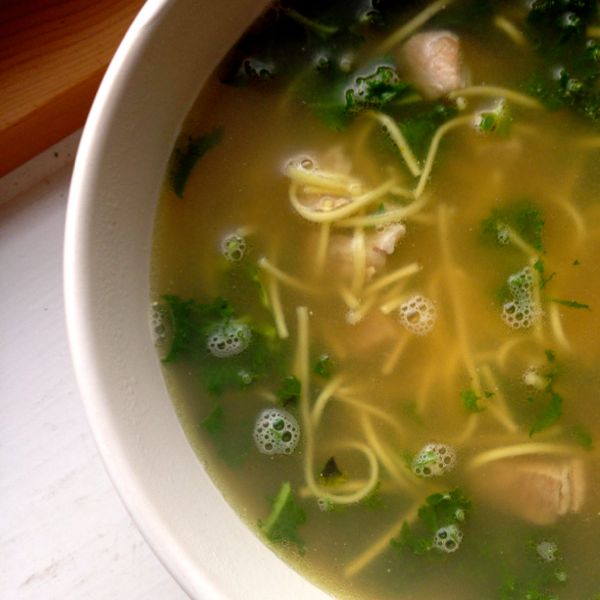
Fodmap Friendly Chicken Stock
When I tell people about fodmaps, they all always without fail tell you how they couldn’t live with onion or garlic. And yet neither of those are things I miss at all. Yes, it’s a pain the proverbials not to be able to eat them but I don’t crave either.
I would however sell a kidney (and this means something. My kidneys are one of the few bits of my body to work perfectly) to eat a ripe crunchy apple. And I miss soup so much it feels like an actual grief.
Technically there are lots of things I can still make soup with so you’d think this was slight melodrama, but the issue is the stock itself. Everyone makes stock with onions and celery and thus I can’t eat it. I can absolutely never order soup when I’m eating out and I can’t even reliably use stock cubes or pre bought stock at home because of the dreaded onion powder issue.
I’ve been working on a version of homemade chicken stock for months and still every bowl of soup I ate made me feel dreadful. When the Monash Fodmap App updated most recently on my phone, I discovered celery is in the amber category and it all became clear.
Because fodmaps aren’t confusing enough with all the different types, they are also dependent on portion sizing as to whether they are suitable for you or not. So for some people even a small amount of wheat or garlic is instantly problematic but with other items you have to exceed a certain serving size to have an issue.
And celery falls into that camp. A 1/4 of a stalk is considered safe and low fodmap. So if you add a stick of celery to a pasta sauce for four people there’s no issue. But because fodmaps are water soluble, if you add two whole sticks of celery to a litre of stock, you end up with fodmap overload.
This explained why stock has still been pushing my fodmap buttons no matter what I did. It was that pesky celery. I hadn’t realised because I’d rather eat cat food than raw celery and when I use it as a sofritto, portion sizing kept it safe.
So how do you make chicken stock that tastes of something if you can’t use onions or celery? You get creative and you use all the fodmap tricks you can. Another little fodmap cheat is that the green bit of spring onions and leeks are safe. Button mushrooms aren’t suitable, but shiitakes (ie porcini) are. And you fall back in love with celeriac.
This knobbly bobbly root veg is the magic ingredient for the depth you need in a stock when you’re so restricted. All the celery fun with none of the pain and discomfort. It is my new best friend in the kitchen.
And my other secret weapon is MSG powder. I know lots of people say it causes all kinds of issues, but the Chinese use it in everyday cooking as we use many umami flavours here and it adds real depth with minimum fuss I find. Try it and I think you’ll be surprised and pleased.
Fodmap Friendly Chicken Stock (makes 1.5 litres)
- 1 roast chicken carcass
- 150g chicken wings or extra chicken bones from thighs
- 2 carrots, grated
- 100g celeriac, peeled and finely chopped
- 4 spring onions, green part only or 1 leek, green only
- 2 anchovy fillets
- 1/2 teaspoon MSG powder (sold as Chinese salt often)
- 1 teaspoon black peppercorns
- 1 teaspoon sea salt
- 3 bay leaves
- 2 dried porcini or shiitake mushrooms, finely chopped
- 1 teaspoon white wine vinegar
- 1.5 litres of cold water
I always always always make my stock in the slow cooker because stock is best simmered very slowly for a long time and that’s basically the whole reason for the slow cooker.
But my friend Carolyne makes amazing chicken stock on the lowest heat on her cooker left for 24 hours in a Le Creuset oval pan with the lid on and simmers it in something her Jewish ancestors would be very proud of.
It’s really worth grating the carrot and finely chopping the celeriac as the smaller the pieces the more flavour you add to the stock. I use the leftover bones from a roast chicken as the base of my stock and when I bone out chicken thighs, I save up the bones in a tupperware in the freezer to add in rather than waste them.
Then it gets really easy. Simply put all the ingredients into your slow cooker crock. I break up the carcass to submerge it and add the cold water. Put on low and cook for 12-18 hours. Allow to cool slightly in the crock before straining and chilling in the fridge. It will become jellified so don’t cool without straining or you’ll have bits in it.
If you’re doing it on the stove, put everything in your pan and cover with cold water. Allow it to come to a bubble around the edges on a medium heat and then reduce to the absolute lowest temperature possible and allow to simmer for 12-18 hours. Strain and chill.
I have two suggestions about this recipe. Actually three in total, but bear with. Firstly, don’t call it bone broth. No one likes a try hard. Secondly, if you’re going to make a lot of chicken stock, buy a slow cooker even if you just use it for that. It’s perfect for it since most people can’t leave their cooker on and go out.
And third, speaking of try hards, I’ve now got a TinyLetter you can sign up to. I’ll be sharing interesting things to read about food and health and what I had for dinner. You’ll get an email once a week and you can share my other love too: nail polish…